Our Daily Homeschool Routine (Preschool and Kindergarten)

I always enjoy reading about other people’s homeschool routines. I don’t entirely know why. Sometimes I think it’s because I’m looking for ideas to steal, and sometimes I think it’s because I wish my life were that organized. On paper, I think our days probably look pretty organized, too, even though they feel chaotic and thrown-together. For a while, when I was first considering homeschooling, I clicked on every single Pinterest Pin I came across that said, “Our homeschool routine.”

So I figured, why not share ours?

As of this writing, my kids are 3 and 5. We have been following this routine for about nine months so far. We had been doing a different routine before, but it wasn’t working out for us. This new one is much better! As I read, and learned through doing, that’s part of the homeschool journey–figuring out what works for your family.

My kids are early risers. My 3-year-old will wake up anywhere between 5:00 and 7:00, though it averages about 6:00 every morning. My 5-year-old usually wakes up around 7:00. When they wake up, I’m usually doing something–working on a lesson plan, writing, reading, etc. So they sit and watch their Amazon Fire Kids tablets (which I absolutely love and cannot recommend enough) while I finish up whatever I’m doing.

Around 8:00 – 8:30, I announce, “Table Time!” (Table Time is our version of Circle Time.) We’ve been doing Table Time for about 2-3 years now, so the kids know exactly what to expect. They turn off their tablets and go sit at their little table. I sit down with them and we go through:

  • What day of the week it is.
  • Today’s date.
  • The weather.
  • The letter of the day. (Recently I’ve been picking letters that are in all of our names so my 3-year-old can start recognizing our names. We say what letter it is and how it sounds.)
  • The number of the day. (I pick random numbers that I want my 3-year-old to work on.)
  • How each kid is feeling that day.
  • Our ASL sign for the day. (We learn or review a new sign every day.)
  • Our schedule/plan for the day.

You can purchase our Table Time template here. It includes a number of clipart activities to make your own daily visual schedule that you can move around as you need. The amazing Mariia Kurochka created and designed all of the images, and all of the credit for their cuteness goes to her!

After Table Time is over, we move on to our lesson and activity. If there’s something I want to teach them, I do it here. (E.g., this is when we discussed nouns, adjectives, and verbs or when I introduce new vocabulary words and new concepts.) This is also when we do any worksheets or book activities. Lately, I’ve been having the 3-year-old focus on writing the letter of the day while my 5-year-old works his way through Teach Your Child to Read in 100 Easy Lessons. (I read some mixed reviews of the book, but I LOVE it for my kid.)

After our lesson and activity, we move on to our religion study. We use the Preschool Daily Devotional and I love it. We’ve gone through a couple of different children’s Bible books, but I keep coming back to the devotional. I think it does a great job at speaking to the kids in ways they can relate to, and I love that it includes a Bible quote every day along with a little prayer.

After we pray, the kids get their allowance and their “bonus,” which is the monetary equivalent of a grade. So, for example, they get $0.25 for an “A,” $0.20-$0.15 for a “B,” $0.10 for a “C,” $0.05 for a “D,” and no bonus for an “F” or incomplete assignment. Their allowance is exactly the same, although my 3-year-old gets five pennies and my 5-year-old gets a nickel.

For $0.05, they can buy 15 minutes of tablet time during the day. For $0.25, they can buy one piece of candy. To encourage cooperation and prevent jealousy or strife between the kids, if one of them buys either tablet time or candy, the other one gets it, too. So they often work together to get double the candy and frequently buy each other tablet time if one of them runs out of coins. (Which is actually SO sweet to see.)

Pretty much every day, as soon as they get their allowance and bonus, they buy candy and tablet time. This is usually around 9:00 – 9:30. I use the time to document what we did for our lesson and activities, their grades, and add in any pictures I took of their work. I also check the goals I set for us at the beginning of the month to see how we’re tracking. (E.g., one month, my goal for my son was, “Finish 15 lessons of Teach Your Child to Read in 100 Easy Lessons.” For my daughter, it was, “Learn all the letters and letter sounds in all of our names.” …we’re still working on that one. :))

When tablet time is over, I get the kids dressed, and from there, it’s a mixed bag of what comes next. Sometimes we go to the store, to a class, clean up the house, go to the park, go somewhere fun–it all depends on the weather, if we have somewhere to be, etc.

We eat lunch anywhere from 11:00 A.M. – 1:00 P.M.. After lunch, we read a book to get ready for nap time. This is where I sneak in our lesson books! I used to try to read them a book as part of our lesson after Table Time and it NEVER worked. I couldn’t get them to sit still for all of it! I could read them a book OR I could have them do an activity–not both. So one day I read them the “lesson book” at nap time, and the next day after Table Time, we briefly reviewed the book and did the activities in my lesson plan. Worked perfectly, and I’ve been doing it ever since.

After we finish reading, my 3-year-old and I usually nap. My 5-year-old plays quietly in the bedroom while we sleep. When we wake up, we’ll either play some more or start cleaning up. Then I start making dinner or doing some more work while the kids play.

Once a week I try to do “one-on-one time” with my kids. (I used to try to do it every day, but we frequently had to cancel it for something else we were doing.) I have one kid play alone in one room while the other kid and I play together. Most of the time, I let my kid decide what we do, although sometimes I’ll force them to play a game with me like Memory or Go Fish. After 30 minutes, the kids trade places. When that 30 minutes is over, I have the kids play together without me for 45 minutes. This is when I try to get a little more work done or just sit on the couch and enjoy not moving for five minutes. 😉 I got the idea for the 1:1 time from my days working in an office, and I LOVE doing it with my kids. When you have more than one kid, you rarely get a chance to just focus solely on one kid and fully engage with them in activity or conversation because you’re usually busy trying to play referee or answering an endless tag-team of questions. The 1:1 time lets me pay complete attention to them and have them show me what they’re interested in or dealing with based on what they want to do. I highly recommend incorporating 1:1 times with your kids.

After my husband gets home from work, we eat dinner together as a family, and then the kids get free tablet time until bed. At bedtime, we read a story and then it’s lights out so we can wake up and do it all over again!

And that’s it! We’re usually done with school in about an hour, maximum two. Then it’s errands and play time!

Homeschooling is pretty freeing, isn’t it?

How I Started Building My Own Homeschool Curriculum (And How You Can, Too!)

As of this writing, my kids are Preschool and about-to-be-Kindergarten ages. While I had never, EVER, EVER, planned to be a homeschooler (a separate post), I suddenly found myself doing an extensive amount of research on homeschooling methodologies, curriculums, planning, and schedules.

The homeschooling curriculum that spoke to me the most was BookShark. I had been an avid reader as a child, and I think some of my most important lessons were learned through books I read. But I have a whole list of things I want to teach my kids, and my own opinion about books I want to read to them, so BookShark just wasn’t for me at this point, which meant it wasn’t for my kids.

I was drawn to the Charlotte Mason method, which introduced me to the concept of “living books.” I liked a lot of the ideas in the method, but I wanted more structure, accountability, and instruction with my kid’s learning. Still, it started me researching living books and the concept of living books, and I really liked what I read.

But I was still struggling. I needed a way to incorporate the lessons I wanted to teach my kids with the Common Core Standards they’d be required to learn to stay at their academic grade-level in our state.

For a while I tried alternating teaching days between “school-type” subjects and “real life” subjects. But it was a lot of work and, frankly, it wasn’t working. They would either be learning the “real life” lessons, or the “school-type” lessons. Not both.

I went back to looking up homeschooling curriculums. The idea of unschooling kind of appealed to me–the idea that I could just teach my kids whatever they were interested in–but I worried about them falling behind academically. I again started looking at box curriculums, but I still didn’t feel good about not having time to teach them the life lessons I wanted them to learn.

One day, I was working on some book activities to do with my kids, and I thought, “You know, my kid could read these words. I could have him use this matching list as reading practice.” (If you’re curious, it was my Shy Robin and the First Day of School lesson.)

That was when it hit me.

I didn’t have to choose.

I could teach my kids what they need to know academically, but still teach them the lessons I want them to know and things that interest them! All I had to do was find topics that interest them (for a while it was bugs, then Egyptian mummies, and then the human body), or topics/themes I wanted to teach them (like kindness, leadership, perseverance, etc.), and build activities that included ones fulfilling the Common Core Standards! It was like I could have my cake and eat it, too! And I really love cake!

My first step was to look at the Common Core Standards again. We live in California, so I used the California Common Core Standards. (If you do this, you’ll want to look up your state’s CCS requirements.) I made a giant Excel sheet and copy/pasted every standard from the .pdf to my spreadsheet. Then I started writing my own “I can” statements based on them. (I first stumbled across “I Can” statements when looking up homeschooling methodologies, and thought it was a really clever way to restate the Common Core Standards in more “friendly,” easy-to-understand sentences.) Then, because I was new to all of this, I compared my list to some of the “I Can” statements I found online. (This is one of the ones I used to compare mine against.)

From there, I graded my kid on how well I thought he could do each of the standards. (Yep, I made him a report card!) There were some we hadn’t even touched on, like, “What do the author and illustrator do in a book?” So for the next book we read, I made sure to talk about what the author and illustrator each do in a book. And for each lesson I made after that, I focused on making sure we were hitting one or more of the CCS he needed to complete or work on.

The most recent lesson I worked on was around shapes. One of the CCS is knowing the difference between 2D and 3D shapes and being able to compare measurable objects. I haven’t talked to my kids at all about 3D shapes, so using the book A Trapezoid is Not a Dinosaur, I created a lesson plan and some activities that talked about 2D shapes, 3D shapes, and also included some comparison activities for the shapes. The book also has a nice message about exclusion and inclusion, so during our read aloud, I made sure we talked about that a lot.

It was that simple.

It was that simple.

I could find a book I wanted to read to my kids, build some activities around it using the CCS as a baseline, and also include activities and discussions around the lessons I wanted them to learn.

It was such an easy solution!

At first I was just writing out brief lesson plans and throwing activities together, but as I started thinking about other people potentially finding them useful, I started putting more time into making everything look pretty and standardized and using real clip-art, not just whatever picture I found doing an image search. I started trying to make sure everything on my worksheets were all lined up and not half an inch off in either direction, which neither I nor my kids cared about, but I was sure someone else would.

(Honestly, that is the hardest part about the whole thing: putting in the effort to make everything look nice!)

I also recently started incorporating videos into my lessons. My kids love videos, and I thought, “Why not use some of the ones that have lessons I really like to teach them, too?” And that’s how the Bluey – Shadowlands lesson plan was born. It was definitely a hit with my kids and by the end of it, my 3-year-old could recognize most of the analog clock times.

I love coming up with activities around books. I love finding fun new ways to teach my kids the things they need to learn and I want them to learn. I love that we’re done with lessons in less than 2 hours (maximum) and then we get to play the rest of the day.

My next goal is to come up with a book curriculum that teaches life lessons, but also fulfills all the 1st grade Common Core Standards. I have to do it for my kid, anyway, so I figured, why not share it out there and see if it helps anyone else?

(If you’re paying attention, you just caught that I’m working on a 1st grade curriculum for my Kindergarten-aged kid. When my husband and I first decided to try homeschooling, he came up with the brilliant idea to have the kids stay one grade level above where they would place in school, so if we ever decide to put them into school, they can focus on acclimating to the social aspects and new environment, and not have to worry about their academics. My husband is kind of a genius.)

Trust me, if I can do it, you can, too. As long as you’re fulfilling the Common Core Standards and your state’s homeschool requirements, it doesn’t matter how you do it.

Okay, so now for the nitty gritty details! How does it work?

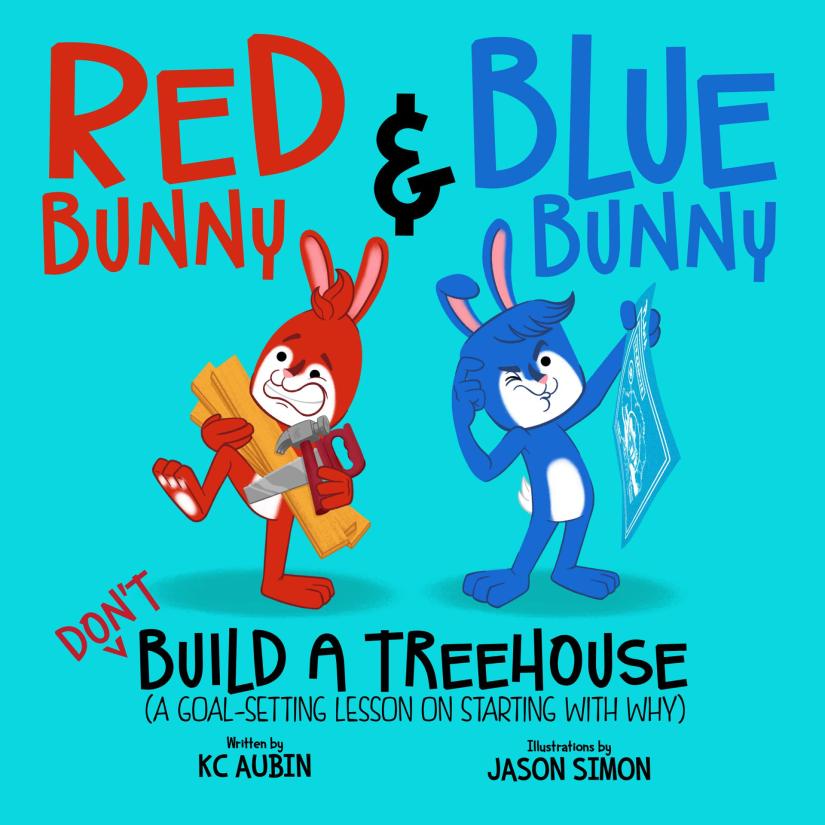
First, I find a book or show that I has a lesson I want to teach my kids. Let’s go with my book, Red Bunny and Blue Bunny (Don’t) Build a Treehouse (A Goal-Setting Lesson on Starting with Why).

I have a One Note template that I created for every book I want to build a lesson plan on. (Download a .pdf of the template here–you can copy/paste it into whatever text-editor you want.) My One Note template contains the following headings followed by blank spaces:

  • Lesson
    • Book title
    • Book link
  • Learning Objectives
  • Summary
  • Vocabulary
  • Key Concepts
  • Think Alouds and Engagement Questions
    • Before Reading
    • During Reading
    • After Reading
  • Activities
  • Videos/Books

After filling in the book’s title, Amazon link, and book Summary from Amazon, I move on to the Learning Objectives. This is where I write in what I want my kids to learn from the book. For Red Bunny and Blue Bunny (Don’t) Build a Treehouse, I (obviously) wanted them to understand that when they set a goal, they need to know why they’re setting that goal and really identify what the problem is that they’re trying to solve. I wanted them to think creatively about solutions, and not just settle on one and decide to work toward that instead of trying to come up with the best solution that really solves their problem.

Next, I look at my kid’s report cards to see what areas they need to practice that are in line with the book’s theme. So even though my kids needed to work on math and shapes, that didn’t really fit in with Red Bunny and Blue Bunny (Don’t) Build a Treehouse, so I focused on the Common Core Standards that did fit in with the book and they needed to work on or practice.

For Red Bunny and Blue Bunny (Don’t) Build a Treehouse, I chose the following CCS (written as “I Can” statements):

  • I can ask and answer questions about key details in a text.
  • I can retell what I read, using key details.
  • I can tell you about characters, settings and the main parts of the story.
  • I can ask and answer questions about words I don’t know in the text.
  • I can name the author, illustrator and tell you what each one does to help tell the story.
  • I can describe the relationship between the pictures and the story.
  • I can compare and contrast what happens to the characters in the story.

After selecting the CCS, the activities just kind of come naturally, because then you’re focused on trying to use the story to build activities that practice those skills. So I jot down Activities that will fulfill the CCS I’ve chosen. My kids really like worksheets (go figure?), so I try to think of some worksheet activities. I like activities that bring the story to life, so I try to create activities that engage their motor skills. In the case of Red Bunny and Blue Bunny (Don’t) Build a Treehouse, I made the following activities that were designed to fulfill the “I Can” statements or my own goals:

  • Story Order
    • I can retell what I read, using key details.
  • What’s Happening Here?
    • I can describe the relationship between the pictures and the story.
    • I can retell what I read, using key details.
  • Compare and Contrast (Before and After)
    • I can compare and contrast what happens to the characters in the story.
    • I can retell what I read, using key details.
    • I can tell you about characters, settings and the main parts of the story.
  • Compare and Contrast (Similar and Different)
    • I can compare and contrast what happens to the characters in the story.
    • I can retell what I read, using key details.
    • I can tell you about characters, settings and the main parts of the story.
  • Red Bunny and Blue Bunny (Don’t) Build a Treehouse Reading Comprehension
    • I can ask and answer questions about key details in a text.
    • I can retell what I read, using key details.
    • I can tell you about characters, settings and the main parts of the story.
  • My Goal
    • Fulfills my learning objectives for them around practicing goal setting and learning why they want a goal.
  • Red Bunny and Blue Bunny Daily Math Practice (v1) or (v2)
    • I can solve addition and subtraction word problems.
    • I can add and subtract within 10 by using objects or drawings to represent the problem.
  • Red Bunny and Blue Bunny Spot the Difference
    • My kids need to work on their attention to detail, so I wanted to throw this in here for fun.
  • Design Your Own Treehouse
    • Another “just for fun” activity to get their creativity going.
  • Build Your Own Treehouse
    • A fun activity to help them work on their problem-solving, creativity, fine motor skills, and engineering skills.
  • Red Bunny and Blue Bunny Treehouse Word Search
    • A fun activity to practice some of their reading and attention to detail.
  • Through the Forest
    • A fun activity because my kid loves mazes, and I love the logic and focus required to complete a maze.

After the Activities are created, I try to group them together in the overall skill/theme of the activities. I only do this for the lesson plans I put on TPT so I can break the activities up and include instructions. For Red Bunny and Blue Bunny (Don’t) Build a Treehouse, I went with the following themes:

  • Recall and Comprehension
  • Bring It To Life
  • Fun Stuff

Once the activities are done and/or grouped by theme, I go back through and write down any Vocabulary words they’ll need to know to do the activities. Then I go back through the book and write down any vocabulary words I think they need to know or I want to highlight for them. I look up the proper definition for each word, then try to rephrase it in a way my kids can understand without changing the meaning.

Then I go back through the book and start writing the Before Reading questions. I didn’t used to do this, but I found my kids were more engaged if I started out asking questions about something to get their attention. I believe teachers call this “activating prior knowledge.” I write questions to ask them about the general theme of the book to start their brains thinking about the topic, then transition into a hook about the book. For Red Bunny and Blue Bunny (Don’t) Build a Treehouse, I went with the following questions:

  • Has anyone ever set a goal or New Year’s Resolution for themselves before? What was your goal?
    • A: Maybe to toss a ball in the air and catch it before it hits the ground, or to finish coloring a picture for your mom or dad before they got home from work? Maybe you wanted to score a goal in soccer or kick your leg above your head?
  • Has anyone ever played in a treehouse before? Was it fun?
    • (If no one has or if someone doesn’t know what a treehouse is) A treehouse is a small house in a tree. You usually get to it by climbing up a ladder or a rope. In a treehouse, you can see really high in the air. You can see into tree branches and over some plants.

Then I went with this hook to transition to the reading that summarizes the book but also ties back to the questions I just asked:

“Well today, we’re going to read about two little bunnies named Red Bunny and Blue Bunny who decide they want to build a treehouse and learn that sometimes there are easier ways to achieve a goal.”

The During Reading questions are the easiest ones for me to write. I definitely ask too many questions and I’m working on paring down. But I go through the book page-by-page, looking at the pictures and the text and asking any questions I think will either engage the kids, keep their attention, or highlight an idea I want them to be thinking about. I also use these questions to fulfill any CCS I didn’t create an activity for. (E.g., who are the author and illustrator?)

Then I write the After Reading questions. I try to ask questions that make them think back on what they just read, think about how they can use the knowledge they just gained, or make sure they understood what we read.

Next, I write down the Key Concepts I want them to have learned through the lesson. (Sometimes I write the key concepts first, then check to make sure I’ve got questions and activities that fulfill the key concepts or go back in and add some key concepts I’ve thought of while creating the questions and activities.) These are the main takeaways I want them to understand from the lesson. Usually these aren’t related to CCS in any way. I tend to focus on the moral and life lessons I want them to have picked up on in the story.

The last piece I fill in is Videos/Books. I don’t always do this. But this is where I list other books about the same topic or videos that I think will reinforce the concept or present it in a different way.

And that’s it! If I’m just doing this for my kids, I’m done. (If I’m going to put it up in my TPT store, I start formatting things to look nice.)

The first few times, chances are you’ll make activities that don’t resonate with your kids. (It took me forever to realize my highly-active kids actually like worksheets.) But as you do it, you’ll see what works best for them.

I hope this breakdown was helpful and inspired you to give it a shot. It’s really not as hard as it seems!

Happy learning!

Image credit

Download Ai Generated, Mother, Son. Royalty-Free Stock Illustration Image – Pixabay

Image by Mimzy from Pixabay

Introducing Red Bunny and Blue Bunny!

It’s here! Red Bunny and Blue Bunny (Don’t) Build a Treehouse (A Goal-Setting Lesson on Starting with Why) is now available for purchase on Amazon!

Look at that gorgeous cover! Doesn’t it just grab your attention right away? The bunnies are so cute and so full of character… You can’t help but feel charmed by them!

A number of people went into making this book possible… Jason Simon, the incredible illustrator who brought an amazing amount of skill and creativity in providing life and character to Red Bunny and Blue Bunny. Rebecca McKinney, the exceptional editor who not only provided editing services, but suggestions (and support!) that made the book so much better than what I originally sent her. My husband, who supported my dream from the beginning and let me bounce every bad idea I had off of him, while also never complaining about the countless drafts I made him read through. And my beautiful children, who listened to version after version of the story and made me feel like the stories were worth sharing with others.

If you picked up a copy of Red Bunny and Blue Bunny (Don’t) Build a Treehouse (A Goal-Setting Lesson on Starting with Why), thank you! I hope you enjoyed reading it. I certainly enjoyed writing it! And for more Red Bunny and Blue Bunny fun, I’ve got an Activity Pack I created to go along with the book that you can print out and share with your kids.

Hope to see you again next time, when Red Bunny and Blue Bunny (might) meet their hero, Captain Carrot!

Until then, thanks for reading!

KC

Albert Adds Up! – An approachable addition and subtraction lesson-in-a-story for kids

Math is boring. Or is it? In the super-cute and fun Albert Adds Up!, kids can get a realistic math lesson neatly layered within an engaging story.

Albert Adds Up! starts with Albert’s sister Wanda returning from the library with a book Albert wants to read. Albert immediately starts offering his toys to Wanda to trade in exchange for reading it first, adding more and more items to his trade pile. Several pages include illustrations with pictures and numbers that show how big Albert’s trade pile is growing so kids can correlate the number of toys with the actual numbers. Eventually, Wanda insists Albert starts taking toys away, and the subtraction starts, until Albert’s trade pile is reduced to zero.

My favorite part of this book was the interaction between Wanda and Albert. As Albert is continually trying to add items to trade to Wanda, she keeps trying to tell him she got the book for him, but gets distracted by the items he’s adding and asking him questions about them in a very cute way. Her distraction enables Albert to continue adding items to his trade pile, because he thinks “it’s not enough” for her to let him read the book first. I don’t like to use the term organic because for a while it got very over-used, but because of the sibling’s interactions, his trade pile is able to grow in a very organic way, allowing the math concepts to continue through the story.

I also have to give incredible kudos to the author and illustrator. They were able to create realistic and likeable characters that you could really understand in a math story! It’s so impressive. And, on top of the math lesson, there’s also a hidden lesson in the story about not interrupting and letting someone finish what they’re saying. Genius!

I will definitely be checking out more of the Mouse Math series, and I would highly encourage you to do the same!

You can download our lesson plan as a .pdf or read it below. I’ve also included links in the lesson plan to some materials I created for the activities.

Lesson

Albert Adds Up!

Albert Adds Up! (Amazon)

Vocabulary

  • Addition
    • Counting the total of two or more numbers together.
  • Subtraction
    • Removing one or more numbers from another number.

Summary

Math skills such as addition and subtraction are used all the time in everyday life. Addition is the act of adding something, while subtraction is the act of taking something away. The “something” can be a number, or it can be an item such as a toy.

Key Concepts

  • Addition is the act of adding something to something else.
  • Subtraction is the act of removing something from something else.
  • If you interrupt someone and don’t let them finish what they’re trying to say, you might miss something important.

Think Alouds

  • Can you think of a time during your day when you need to add or subtract something?
  • What would have happened in the beginning of the book if Albert had just let Wanda finish what she was trying to tell him?

Activities

Activity 1: Ten-frame 1-10

Materials

Instructions

  • Provide each kid with the paper with 1-10 written on it or the 1-10 Table Counter.
  • Have the kids practice adding and removing counters from the 10-frame and counting how many are remaining.
  • Optional: Have the kids write their results on the blank addition/subtraction sheet.

Activity 2: Toy Exchange Addition and Subtraction

Materials

  • 5-10 small toys per child, such as mini dinosaurs, action figures, balls, etc.
  • Optional: Blank piece of paper and pen OR a blank addition/subtraction sheet and pen (download the Fill-in Addition and Subtraction sheet pdf).

Instructions

  • Provide each kid with 5-10 small toys and place them into pairs.
  • Have them practice negotiating exchanging toys. (E.g., “I’ll give you this t-rex for your ball.”)
  • Have the kids count how many items they have.
  • Repeat.
  • Optional: Have the kids record their starting numbers, the numbers they added or removed, and the total result.

Activity 3: Read-along counters

Materials

  • Pre-step: Download the Albert Adds Up Toy Clips pdf. Laminate (optional) and cut into pieces so every kid has one of each picture.
  • Optional: Small box or container for the toys as a pretend toy box.

Instructions

  • Provide each kid with one of each toy piece or with the “toy box” with toy pictures in it.
  • As you read Albert Adds Up! have the kids play along, adding and removing toys from their “toy box” as Albert does in the story.
  • Practice counting the total with the kids as you read along.

Sallie Bee Writes a Thank You Note – The Importance of Saying “Thank You”

We’re always reminding our kids to mind their manners and say, “Please,” and, “Thank you.” Sometimes, “Thank you,” can become such an ingrained response that we forget what it really means. Sallie Bee Writes a Thank You Note is a friendly and approachable lesson-in-a-story that reminds you to take time to really think about why you’re saying “Thank you.”

Sallie Bee Writes a Thank-You Note starts off with Sallie receiving a hand-made scarf from her grandmother. Sallie writes her grandmother a thank you note using a “formula” of sorts–being specific about why you’re saying thank you and letting the person know how what they did made you feel. She enjoys writing her thank you note so much, she looks for more reasons to write thank you notes through the rest of the book, using her formula.

I really enjoyed reading this book to my kids. I really liked that Sallie didn’t just write a thank you note for receiving a present, but she also wrote them for acts of kindness she received through the book. It’s a really approachable way to remind kids they have a lot of reasons to be thankful–not just when they receive presents. And the kids really seemed to have fun with the activities we did around this book, which reinforced the ideas and themes of being grateful and saying thank you.

But I have a confession to make. As I was working on this lesson, I had an epiphany. One reason I wanted to do a lesson on this book for my kids was because they can be very ungrateful, and I wanted to teach them about gratitude and what it truly means to be thankful and blessed.

While I was coming up with examples for reasons they have to be grateful, I realized something that shocked me: I am grateful they are ungrateful, because it means their lives are so wonderful and blessed they don’t know how truly good they have it.

At that moment, I felt my frustration at their lack of gratitude slip away, replaced by my own sense of gratitude that my husband and I have been able to provide such a great life for our kids. While I still think it is critically important for them to be grateful and to understand they are very lucky and blessed, I am approaching it from a place of happiness and joy instead of frustration.

My own example, I think, shows just how critical gratitude is to happiness, and that we can always do more to understand how good we have it.

You can download our lesson plan as a .pdf or read it below.

Lesson

Sallie Bee Writes a Thank-You Note

Sallie Bee Writes a Thank-You Note (Amazon)

Vocabulary

  • Grateful/Gratitude
    • Being thankful; showing appreciation for someone or something.
    • Generally gives a feeling of warmth that stays with you.
    • “Gratitude is an attitude” – more of a state of mind than being thankful. A realization that you are lucky to have what you have.
    • Gratitude can change your perspective on frustrations if you reframe it.
  • Thankful
    • Being grateful or happy for something someone did or something you received.
    • Generally a temporary feeling directed at something someone did for you or something you received.
  • Thank you note
    • A note sent to someone to convey thankfulness at something they said or did.

Summary

Parents teach us at a very young age to always say “please” and “thank you.” Saying “thank you,” is an almost automatic response when someone says or does something nice for you. But taking the time to really appreciate someone makes them feel good and also helps you understand behaviors you do and don’t like that you can then apply when dealing with others.

Key Concepts

  • Saying “thank you” is a way to show someone you appreciated/liked what they did.
  • Be specific about your thank you–tell the person exactly what they did that you are thanking them for, and why you are thanking them for it.
  • When thanking someone, tell them how what they did made you feel.
  • Understanding why you appreciated something someone said or did can help you understand how you want to treat others. (E.g., If someone did something nice for you, and it made you happy, you can do something nice for someone else to make them happy.) It also encourages the person to continue to do nice things.
  • There are subtle differences between being thankful and being grateful, but thankful is generally a temporary feeling related to something someone did, and being grateful is generally related to a feeling that stays with you.

Examples

  • You are thankful that Mom or Dad got you a drink. You are grateful that you have family who loves you and cares for you.
  • You are thankful your sister or brother shared your toy. You are grateful you have someone to play with.
  • It is hard to explain how to be grateful without also explaining the alternatives. I would encourage you to share with your kids what you feel comfortable sharing and you think they can process. For example:
    • We are lucky to live in America. Some people in other countries travel on foot for MILES, carrying just a bag of what they own, through dangerous terrain, just to have a chance to live here.
    • We have access to clean, safe water. Some people don’t. They have to drink water people and animals have bathed or pottied in.
    • We can walk, run, climb, and play. Some people are sick and can’t move around at all.
    • We have a beautiful house filled with toys and clothes and love. Some people don’t.
    • We have access to doctors and medicine when we get sick. A long time ago, before scientists could study diseases, there were no medicines and people just had to suffer.

Think Alouds

  • Why is it important to say “thank you”?
  • Can you think of a time you’ve wanted to say “thank you” to someone? Did you?
  • How do you think the people who received Sallie’s “thank you” notes felt? How would you feel if you received a “thank you” note?
  • What were the elements to Sallie’s thank you notes?
    • A recipient (person to thank).
    • A specific reason for the thank you note that includes what the person did and why she was thankful for it.
    • How what the person did made her feel.
    • Her name.
  • Why do you think it’s important to be specific when telling someone what you’re thankful for?
  • Why do you think it’s important to tell someone how what they did made you feel?
  • Can you think of something you feel thankful for? Can you think of something you feel grateful for?

Activities

Activity 1: Understanding Your Thank You

Materials

  • None

Instructions

  • Ask the kids to think about a person they thanked recently.
  • Ask them who the person was and what the person did.
  • Ask the kids why they were thankful for what the person did.
  • Ask the kids how they felt about what the person did.
  • Ask the kids if they can think of ways to imitate what the person did with their friends.

Activity 2: How Many Things Are You Grateful For?

Materials

Instructions

  • Pre-step: Print as many copies of the Sallie Bee Writes a Thank-You Note Reasons to be Thankful Counter worksheet as you need. Alternatively, write “How Many Things Are You Thankful For?” at the top of the paper and add an empty box next to it. Optional: Add a 10 or 20 frame box to the paper.
  • Ask the kids to think about how many reasons they have to be thankful. (E.g., a friend came over to play, they made a goal in soccer, their mom or dad bought them their favorite juice, etc.)
  • For every reason they can think of, have them make a mark on the paper with the pen OR add a counter to the paper.
  • When the kids can’t think of any more reasons to be thankful, ask them to count up how many marks or counters are on their paper and write the number in the box.
  • Point out how lucky the kids are to have so many reasons to be thankful.

Activity 3: Write a Thank You Note

Materials

  • Paper or cards
  • Markers or crayons
  • Optional: Stickers
  • Optional: Envelopes

Instructions

  • Ask the kids to identify one person they want to write a “thank you” note to.
  • Provide the kids the materials, and ask them to write a “thank you” note including:
    • Who the person to be thanked is.
    • What they did to receive the thank you card.
    • How the child felt about what the person did.
  • Optional: Let the kids decorate the cards and address the envelopes to the recipient.

Additional Videos/Books

Elmo’s Best Thanksgiving Ever

Sallie Bee Writes a Thank-You Note Reasons to be Thankful Counter background image courtesy of Pixabay. Image available here: https://pixabay.com/illustrations/thank-you-polaroid-letters-2490552/.

Howard B. Wigglebottom Learns to Listen Book Activities

Need a refresher on why it’s important to listen? Looking for some activities to encourage listening with your kids? (So did I…) Luckily, Howard B. Wigglebottom Learns to Listen is a great read on the importance of listening, and the consequences that follow when you don’t!

Howard B. Wigglebottom Learns to Listen follows Howard, a little bunny rabbit who just can’t seem to listen! He doesn’t listen at story time, and instead bounces his ears straight into a fan. He doesn’t listen to his friends at the cafeteria and slips on a banana peel. He doesn’t listen while playing and takes a baseball to the eye. Howard gets tired of getting in trouble for not listening, so he resolves to do his best to listen, and gets rewarded for his efforts with a gold star and extra play time at home.

Howard B. Wigglebottom Learns to Listen is a quick read with only a few sentences per page, paired with entertaining pictures of the mishaps Howard gets into because he doesn’t listen. I liked that it showed lighthearted consequences to not listening, because so often when I tell my kids not to do something, I’m met with, “Why?” This book illustrates “why” perfectly.

I didn’t really create a lesson plan around this book, because my kids already understand what listening means, and there wasn’t really anything to explain. Instead I just gathered up activities that reinforced listening skills. My 4 year old had a great time with them, but my 2 year old didn’t quite understand what she was supposed to be doing. For example, my 4 year old caught on very quickly to, “Do As I Say, Not As I Do,” but my 2 year old kept doing what I was doing until she saw what her brother was doing and started copying that. We played it at the dinner table, too, and instead of listening to my instructions, she just watched what her dad and brother were doing and did that. She also struggled with “Mother, May I?” and after she asked if she could take two steps, just took two steps. So I think we’re going to have to work on that. (Haha!)

Below are the listening activities we did to go along with the book. Enjoy!

Lesson

Howard B. Wigglebottom Learns to Listen

Activities

Activity 1: Mother May I

Materials

  • Open space

Instructions

  • Have your kids stand on one side of the room while you stand on the other with your back to the kids.
  • Taking turns, one kid starts and asks, “Mother May I take x steps?” (where they fill in the ‘x’ number.)
  • You say, “Yes, you may,” or, “No, you may not, but you may do x instead,” (where ‘x’ is your own suggestion).
  • The first kid to get to you wins.

Wikipedia rules for Mother May I?

Activity 2: Red Light, Green Light

Materials

  • Open space

Instructions

  • Have your kids stand on one side of the room while you stand on the other side.
  • Call out, “Green light!” and turn around so your back is to the kids.
  • The kids race to you as fast as they can until you yell out, “Red light!” and turn around so you’re facing the kids again.
  • Anyone who moves while you’re facing the kids is “out” and either has to return to the starting line or sit out the rest of the game.
  • Call out, “Green light!” and turn around again so your back is to the kids.
  • The kids race to you as fast as they can until you again yell out, “Red light!” and turn around so you’re facing the kids.
  • Anyone who moves while you’re facing the kids is “out” and either has to return to the starting line or sit out the rest of the game.
  • Repeat until one of the kids reaches you.

Wikipedia rules for Red Light, Green Light.

Activity 3: Do As I Say, Not As I Do

Materials

  • Open space

Instructions

  • Have the kids face you with enough space around them to move.
  • Say, “Do as I say, not as I do! Jump up and down!” but instead of jumping up and down, you sit down.
  • Continue with conflicting words and actions until the kids get bored.
    • You can also have everyone stand in a circle and take turns being the caller.

Extension

  • You can play this anywhere! Even at the dinner table. It can be good for a laugh.

Activity 4: What do you hear?

Materials

  • None

Instructions

  • Have the kids sit silently for a minute. You can either use a timer or just go until the kids can’t take it anymore.
  • Ask the kids what they heard.
  • Have the kids sit silently again.
  • Ask the kids if they heard anything else/different.

Videos/Books

Listen, Buddy (Amazon)

Another book on the importance of listening, featuring another rabbit! Buddy doesn’t listen to anyone, and often misunderstands what he does hear with humorous results. When Buddy doesn’t listen to his parent’s directions and ends up at the home of the Scruffy Varmint, his difficulty listening angers the Scruffy Varmint into trying to make him into soup! Lesson learned: Buddy listens after that.

Living Books and the Birth of Red Bunny and Blue Bunny

I discovered the concept of living books by accident.

My four year-old couldn’t get to sleep one night. It had been raining for days, so we couldn’t go to a playground and play and had basically turtled-up in our house. So while we lay together, I began telling him a story about two bunnies named Red Bunny and Blue Bunny whose burrows had been flooded. Some squirrels, seeing the bunnies’ plight, quickly used a pulley-system to help the bunnies out of the flood and up into their homes in the trees. Thus began a friendship that culminated in a huge party thrown by the bunnies to thank the squirrels for their help and hospitality.

My four year-old loved the stories, and thus began an almost-nightly storytelling time. At a loss for new ideas, I decided to tell some stories focusing on some problem behaviors I wanted to work on with him. (Namely asking kids, “Can I play with your toy?” at the playground instead of, “Can I play with you?” And giving up when he couldn’t do something immediately.)

One of the stories I told was about Blue Bunny and his baby sister Baby Blue Bunny. My son hadn’t been playing very well with his younger sister, and so I told him a story about Blue Bunny realizing Baby Blue Bunny was really fun to play with. The next day, to my astonishment, my son was surprisingly nice to his sister, even including her in his play.

Encouraged, I tried again. And again. And I was shocked to see the difference in his behavior after these stories. It sent me on a quest to find more books on the topics I wanted to work on with him. I typed things like, “Perseverance picture books,” into Pinterest, and, “Friendship picture books.” And that led me to discover this concept of “living books.” Books that teach through stories rather than dry facts.

(It also led me to a homeschooling curriculum called “Book Shark,” that I haven’t purchased, but I adore the idea of it and looking into it really got my brain turning.)

I had been trying to teach my son some lessons already about goal-setting, but they weren’t taking. He was bored, not listening, and couldn’t remember what I had said even ten minutes later. I was discouraged, but didn’t give up. Instead, I started using stories to teach him the lessons I wanted him to learn, and was stunned to see how well he took to them. Using entertaining stories helped him pay attention to the lesson, and conversations during and after helped the lesson stick.

It was this discovery that led me to wanting to write my own children’s books. I had never considered writing a children’s book, but I realized the concepts I was trying to instill in my children weren’t on the bookshelves. (That could be because I’m horrible at searching for things online and there aren’t enough hours in my life to go through every book in the library.) And thus, living books led me to writing Red Bunny and Blue Bunny, weekly visits to the library, and a definite improvement in my son’s behavior and understanding.

I haven’t looked back. It had been years since I’d been in a library, but now we’re almost weekly-visitors. (I forgot how much I LOVE the library. Isn’t it amazing being surrounded by all those books?) Using a combination of Pinterest, online searches, and just general bookshelf-browsing, we’ve covered all sorts of topics that I see him incorporating all the time.

If you haven’t tried using stories to teach your kids, I highly recommend it! Kids love stories, so why not include ones that teach them something while entertaining them?

Happy reading!